I had a little bit of extra time on my hands after the holidays so I decided to do some welding. It has been a while and my workshop is not fully equipped to start working on a more serious project, so I thought a rocket stove would be an interesting challenge. Besides I’ve had the idea of making one for ages.
There is quite a bit of misconception out there about the dimensions of the stove. So took a deeper dive into it. Some say there is a ratio to follow, to make sure the stove actually works, but with my design, there should not be much of a problem if you make the feed tube or the riser a bit longer, or shorter.
So this is what I came up with:
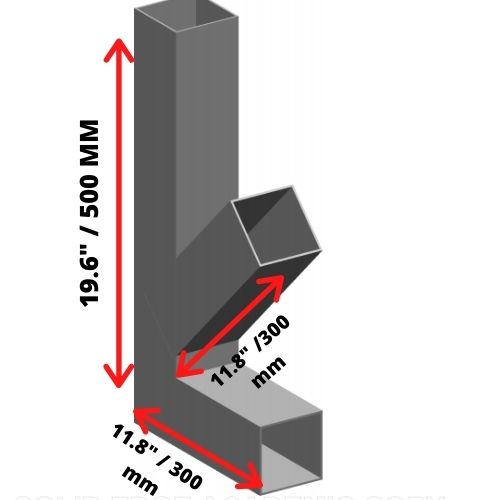
What you need for the project:
Contents
- 40 inches of 4×4” 8 gauge square tubing (1000X100x100x4 mm)
- Two pieces of flat bar measuring 5” (130mm) each. Use whatever flat bar you have at hand. I used a 1/4 X 1 (30x6mm) flat bar.
- 4X4” 12 gauge (100x100mm 2mm) piece of sheet metal.
- 1 decorative hinge.
- Something to weld on as a knob. (we’ll talk about this later)
- Heat-resistant paint.
- A Welder.
- Angle grinder with grinding and cutting wheel.
How to make a rocket stove for camping
Once you have everything you need for the project, let’s have a look at the complete process on how to make one.
Step 1
I have to note that it’s just purely a recommendation to use 8 gauge material. That’s just what I had laying around. The material can be thinner, but anything less than 12 gauge would be too thin in my opinion.
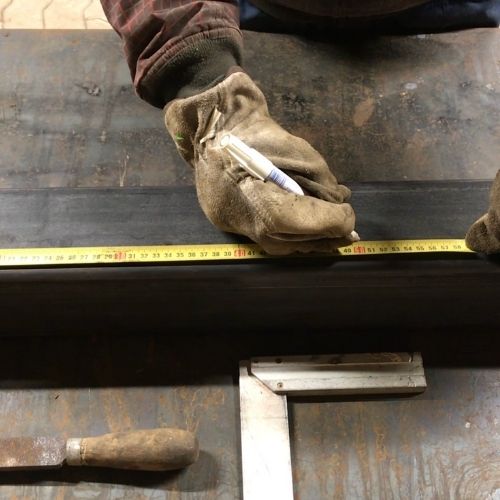
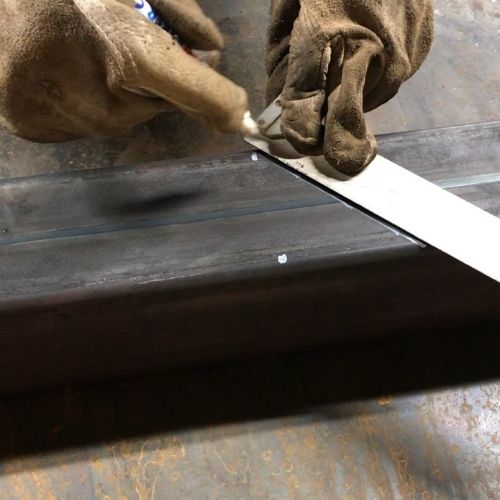
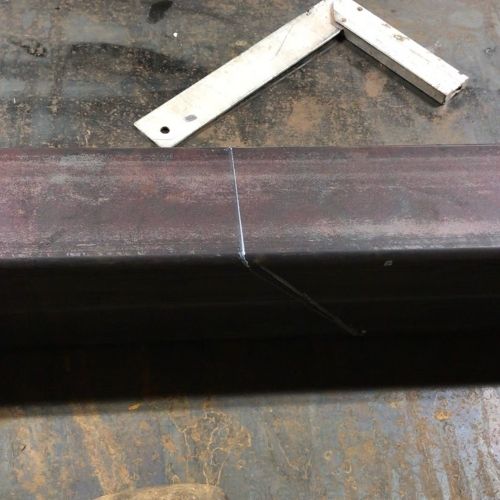
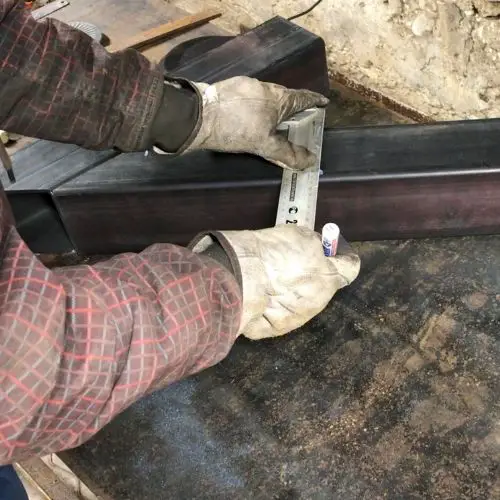
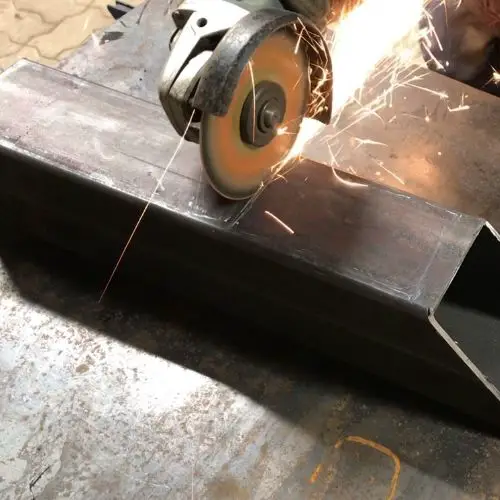
So you have 40′ 4×4″ square tubing. Measure 20 inches from one end, make a mark and then using a speed square, draw your first 45-degree line. Do the same on the other side.
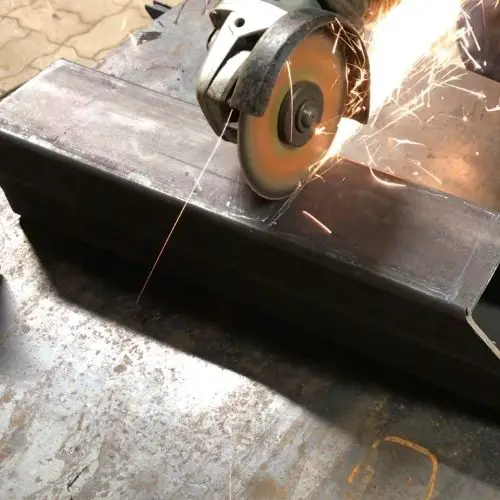
Once both lines are down, connect the endpoints of the lines with each other. So you would create a continuous line around the tube which you can use as a guide for cutting the tubing with an angle grinder. (See the images below)
If you have, you can also use a chop-saw, I don’t have one, so this is what I did.
Step 2
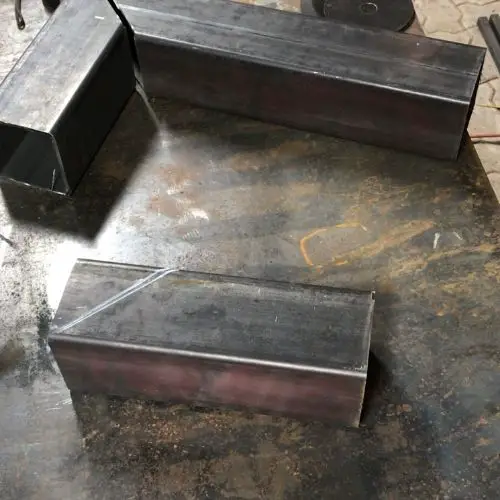
Once step 1 is completed, Take the longer piece, measure, mark and cut it in half.
Step 3
Once cut in half, take the cut-off piece, measure, mark, and cut 45 degrees off of it. That will be the feed tube of the stove.
Step 4
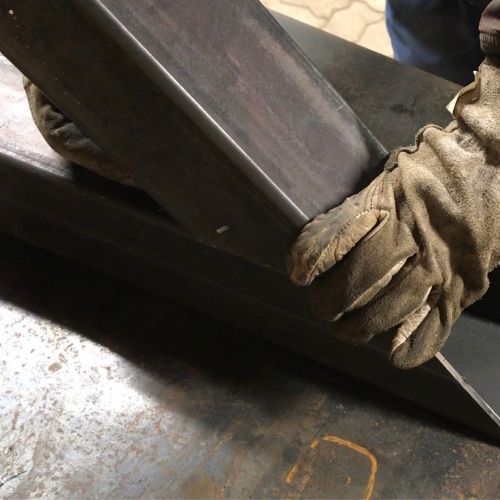
Using the feed tube, mark down the hole placement on the riser of the stove. It should measure around one inch from the bottom to make enough room to weld it from the bottom.
The hole is necessary to feed wood into the stove.
It is important to note that you should not cut directly on the line but rather inside the line to make sure the hole does not come out too big.
Step 5
Make sure that the fittings are tight, if you have big caps you’d had to fill while welding, use an angle grinder to grind off some excess metal before final assembly.
If the joints match up perfectly, bevel the edges of the tube slightly so the welds blend in better and the beads don’t come out too high.
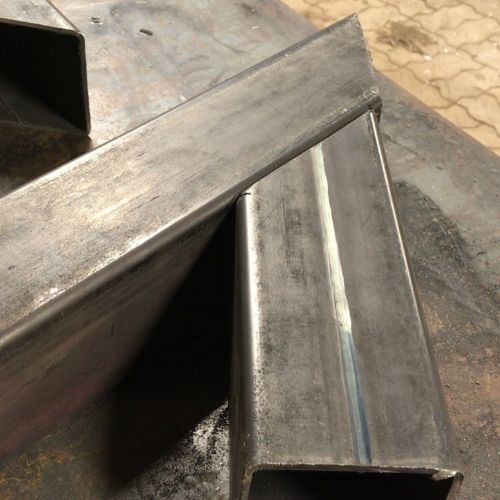
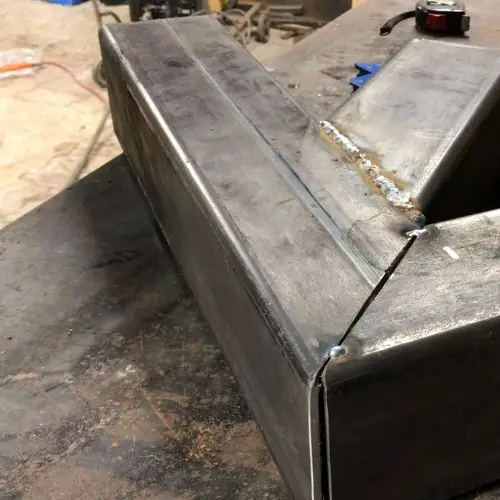
For the tight corners, it would be best if you have a stick welder. With MIG, they were a pain in the butt to get done. The joints are too narrow so the stick-out had to be huge. I ended up welding several beads on top of each other to make it look decent.
Now if you do not have much welding experience it has to be said that you can’t just start welding the camping stove together. It would be best if you first tack the tubes to make sure they do not move out of place.
Another factor that comes into play when welding is the distortion of the metal once the weld starts to cool down. In this particular case, it is not so critical, but still, make sure you tack it together properly from both sides.
You have to sequence your welds for best results, you can read more about it here.
Step 6
Once you have welded the stove together, it is time to add the flat bar on top of it so you can use the stove for cooking. If you think about it, you can’t just place your pan directly on top of the stove. It would kill the airflow, thus the fire would fizzle out.
To make the rack as I have, take the flat bar and drill a small hole in the center of it. Preferably the same size as the thickness of the flat bar.
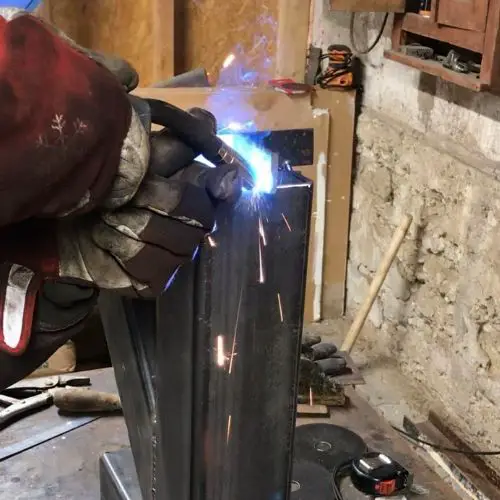
Once the hole is done, make two parallel cuts from the top to the hole. Repeat the process with the other piece. Now you can assemble them and weld it on top of the stove. See pictures below.
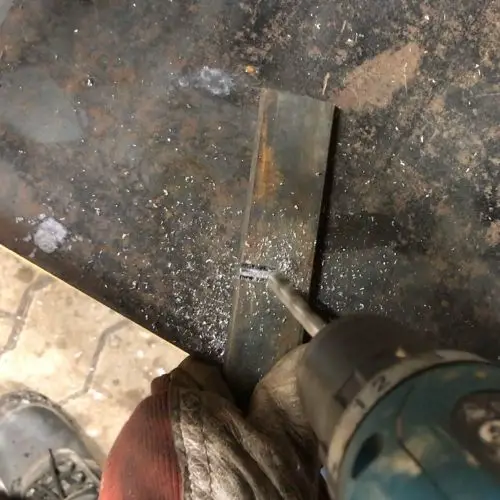
Now what I did wrong here, is that I made the cuts before drilling. Bad way to go about it, so definitely drill the hole BEFORE cutting.
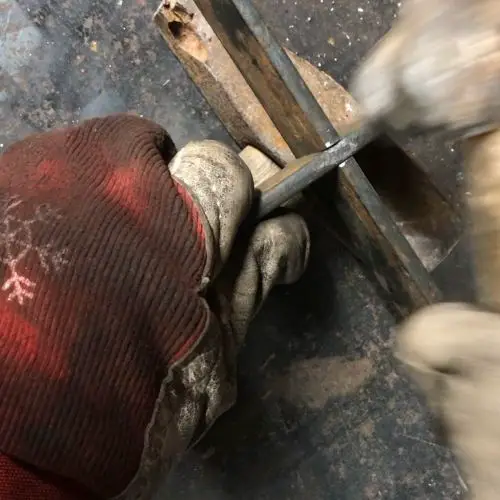
Being too precise can be bad as well. I made the cuts just a tiny bit too small, so I had to use a hammer to make them fit.
Anyway, once completed you can weld it on the riser tube. I just placed nice fat tacks on each contact point and so far it holds.
Step 7
The next step would be to weld on the door for the feeder tube. Without one, the stove will not work properly. It helps to create a stronger airflow from the bottom tube to the heat riser. (where you place your cooking pot)
As a door, we’ll be using the 12 gauge material mentioned in the beginning.
In this step, you can use a decorative hinge to weld or bolt it on. You can grab one from your local store or even Amazon. They usually cost around few bucks.
I did not have one laying around so I made the hinge myself. It is not as pretty but it works. In case you would like to make one yourself, all you need is some metal rod and a piece of tubing that sits right around it.
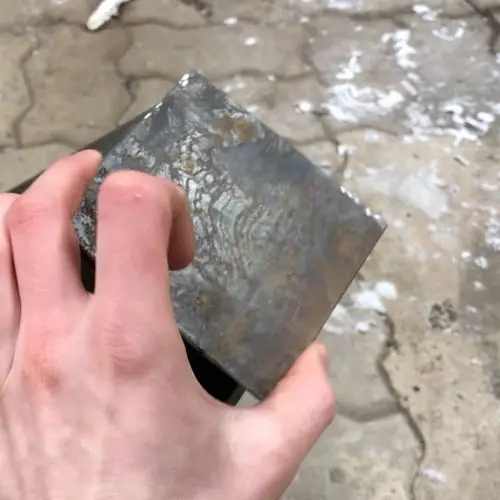
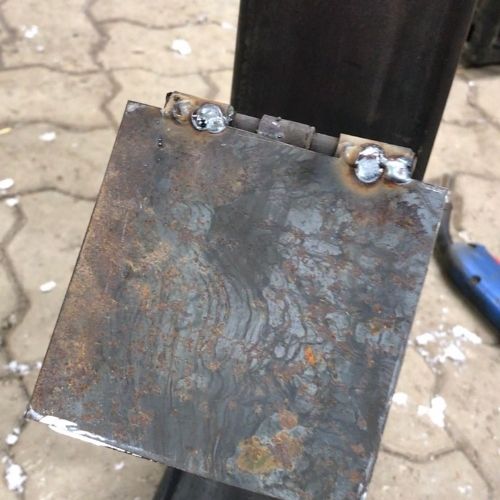
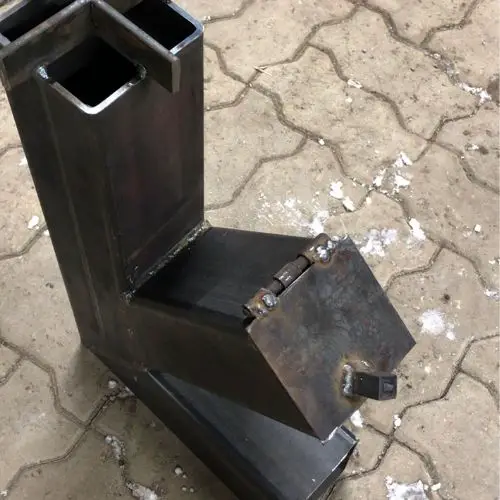
One thing I did wrong here is that I used a solid square bar as a knob. I really did underestimate how hot the stove will get. I would advise you to weld on a spring there or something else that does not conduct heat as much.
Step 8
The last step would be to clean the stove from any mill-scale and rust, then paint it with heat-resistant paint.
I almost forgot to mention that it would also be a good idea to grind down any sharp edges at this point. For example, round the corners of the door or even grind down your welds if you’d like.
I didn’t grind them and the reason is something to consider yourself. The paint does not stick very well on ground surfaces without any other form of pre-paint preparation like sanding.
As an extra tip, I would just remove the mill scale with a wire wheel and you are good to go.
Step 9
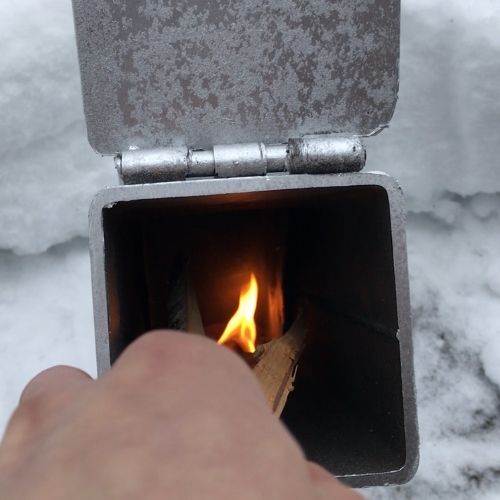
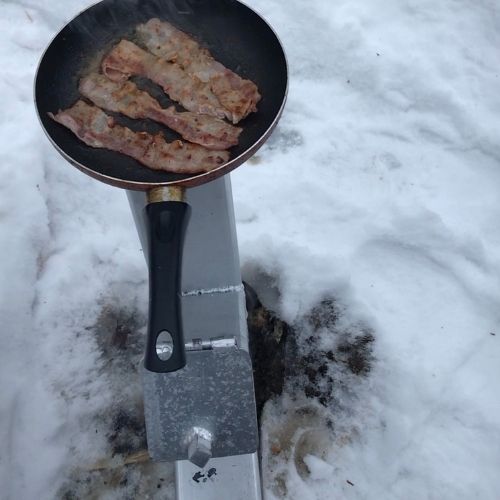
Test, and enjoy the fruits of your labor by eating bacon.
This is, perhaps, the most important part of the whole build. I think we can all agree that there’s nothing better than a piece of crispy bacon cooked over live fire.
Conclusion
To sum it all up, it took me few hours to complete the project, and considering similar stoves go for more than 100 bucks, it was worthwhile.
I hope you enjoyed this post as much I enjoyed the bacon from that stove. If you have any questions, thoughts, comments, feel free to shoot us an email!
I will upload the PDF version of this article in the download section so you can download it and use it as a guide while building your own.
Make sure you check out other sections of the blog as well. Whether you are a beginner welder, experienced stick welder, or just interested in welding and tools, we got you covered.
