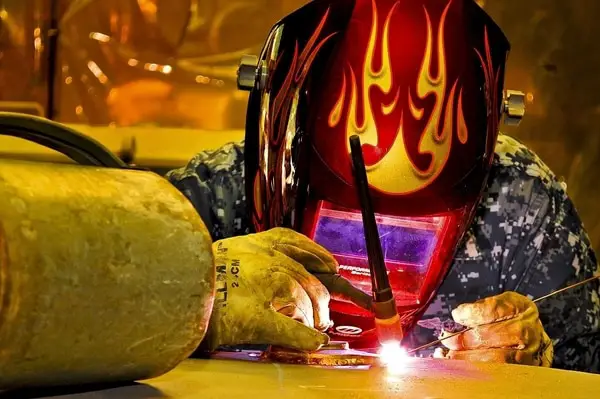
Welding is surely an awesome skill with many applications but with all the terminology, Welding for beginners can get very overwhelming, so I decided to create an easy to understand in-depth guide for you, trying to give a clear answer to all the important questions you may have.
Common Welding Methods
Contents
Welding has been around for hundreds of years, and like all technology around us, welding has gone through quite an evolution over the last few decades, making it simple enough for everyone to learn it with the right amount of effort put in.
Now, to keep it simple, we are going to focus on the three most popular and intuitive welding methods for beginners.
- MIG Welding (you can see it referred to as MAG as well) – easiest welding for beginners to learn.
- Flux Cored Arc Welding (FCAW, almost identical to MIG, even less complicated)
- Stick Welding (Shielded Metal Arc Welding or SMAW) – considered to be the most commonly used method in America, but more challenging welding method for beginners
The first method is a process in which a wire electrode is continuously fed through a flexible tube and out of the nozzle of a welding gun into the welding pool, joining the base metals together.
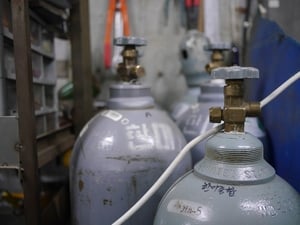
What you need to understand is that with MIG and MAG welding a shielding gas is used to protect the weld from other gases in our atmosphere. The only difference between them is that different gas is used. In a process of MIG, we use argon or argon combined with helium. In MAG welding welders use active gas (CO2 or CO2 and argon mixture) to weld carbon and low-alloy steels.
Please note that if you want to weld both, ferrous and non-ferrous metals, you want to have different shielding gas cylinders, argon and Co2 (75/25) for mild steel, tri-mix of argon, helium, and CO2 for stainless steel and for aluminum 100% argon is recommended. In most cases if you only work with mild steel, CO2 will work just fine, it produces more splatter, but welding thicker materials using CO2 helps to get better penetration, thus welding would be stronger.
Fluxed Cored Arc Welding is mostly used with the same equipment as with MIG welding, the main difference is that shielding gas is not usually needed since wire used in FCAW is hollow, containing flux to protect the hot metal from reacting with the air and it is even more intuitive welding method for beginners.
You can use a regular MIG machine with fluxed core wire, however, you may have to replace regular feed roller to knurled one to avoid flattening the wire. Also, keep in mind that you may have to change the polarity of the wire for cleaner welds. It should be DCEN which stands for Direct Current Electrode Negative or simply put, welding wire should be negative. If your machine does not have a switch for that, take a look at your manual, you should be able to change the wire polarities yourself.
I know, even the basics of welding seem too complicated!
Stick is one of the oldest and probably easiest methods to understand, it is similar to FCAW process since with this method you do not need any shielding gas because the wire or “stick” used in this process is already coated with flux. As you contact the electrode with base metal, it starts to melt while the coating around the electrode creates a cloud of gases that shields the hot metal. The main advantages of stick welding are that the machine is cheaper and that you have the ability to weld thicker materials than with MIG. On the other
What do I Need to Start Welding?
It depends on various factors, but first, you have to choose the method you want to learn. Here are a few questions you should consider before making a decision:
- Where I’m going to work most of my time?
- Do I want to learn other welding methods in the future?
- What kind of projects I will be doing?
If you are going to spend most of the time indoors, working with thinner metals, I definitely recommend buying a MIG. First of all, it is much easier to work with sheet metal using MIG, secondly you do not have to change the wire very often, and last but not least, it does not produce any slag!
If you are working mainly outside and you have to move or carry your machine frequently, I would recommend choosing between FCAW or SMAW method. The main reason is, that these processes don’t need gas, which would get blown away even if small wind currents are present, leaving us with a defective and weak weld.
If you are certain that you want to improve your welding skills in the future, then learning a stick welding first might make your learning curve narrower with TIG and MIG. Another thing to take into account is that if you are going to work most of the time with materials 3/8 inch or thicker it might be more reasonable to buy stick welder.
Overall, stick welders are usually cheaper, smaller, and can penetrate thicker materials better, but working on small projects with thin metal, like body panels and etc. would be more difficult. In most cases, I would recommend MIG to every beginner because it can do more than enough if you are a hobbyist or a beginner. If you consider buying your first MIG, then I have a guide for you.
If I Choose Stick Welder, Should it be AC or AC/DC Machine ?
AC or Alternating Current means that the current continuously switches polarities back and forth from positive to negative and negative to positive, 120 times per second (60 Hz). As a result, Welding on AC is not as smooth as welding with DC, therefore the quality of the weld is usually not as good. Furthermore, because of the constant polarity switches, electrodes tend to extinguish while welding with alternating current, so it is important to keep in mind that with AC settings,
This method gets the job done, but is rarely used by most welders, AC is mainly applied while joining metals that are magnetic or with surfaces that are very rusty (where you don’t want high penetration).
DC always remains the same, either DC positive or DC negative that means that the electrons always flow in the same direction instead of changing polarities. For most welders, this method is preferred because it has some advantages like smoother starts and more stable arc, less splatter and it is easier to weld in awkward positions. DC positive also provides higher penetration into metals and DC negative results in the opposite. For example, DC negative is used for welding thin metals to avoid burning through the material.
In conclusion, considering that in the future you want to work on different projects, it would probably be the best choice to spend a couple hundred extra to buy an AC/DC machine.
Should I Buy Plasma Cutter?
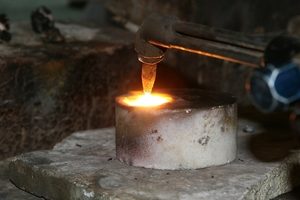
As a beginner, you certainly need something to start out with to cut materials, but it does not have to be a plasma cutter. It is great to have a plasma cutter, but they are quite expensive, and you can only use it for cutting. Furthermore, it needs outside air supply, so you will need to buy an air compressor as well to use it.
The most universal tool if you will be working with thicker materials would definitely be an
The third option, which I am using a lot is angle grinder with cutting disc. An angle grinder is a great option if you are working with thinner metals. You can make very precise cuts quite fast, and probably you will need one anyway to grind welds and prepare materials, it might be a way to go.
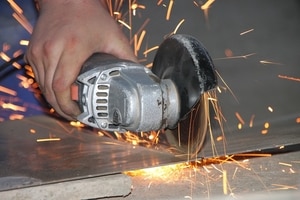
I don’t want to scare you, but this tool has to be treated with respect and in the right way. I’ve seen cutting discs break while cutting and they can penetrate your body quite easily, so the outcome could be lethal. If you still choose to use an angle grinder, please, read the manual and do your own research on how to use it properly.
Some tips from me:
- Before installing the disc, make sure grinder is unplugged
- Always make sure the safety guard is on
- Use correct disc, make sure it is not damaged nor expired
- Use it with side handle
- Use cutting disc for cutting and grinding disc for grinding
- The cutting wheel is not designed to withstand the side pressure, so make sure your metal is not under stress.
If you have never worked with one before, and you don’t know anyone who could show or teach you in person, I would strongly advise you not to use it for cutting. Just buy torch kit for that and rent oxygen and acetylene bottles from your local supplier, or buy a plasma cutter. With these two methods, although they are dangerous as well, there are fewer things that can go wrong, so they are more suitable for beginners.
If you choose not to use the grinder at first, then for metal preparation you must have at least few metal files and wire brush and depending on the welding method you chose, a chipping hammer might be necessary.
Other Equipment You May Need
There are a lot of tools and items that can make welding for beginners easier depending on the projects you will be working on, but the first thing that you will certainly need is something to mark your workpiece before cutting. For that, you may see people recommending soapstone, but I prefer Riter welder pencils. The marking does not come off from base metal as easily as with soapstone, and you are able to draw really sharp and
For measuring, of course, you need a tape measure and for smaller things, a metal ruler would be nice to have. For drawing perfect 90-degree angles, you should have at least one framing square.
A lot of times I find myself using my MIG welding pliers, but a pair of regular ones would work just fine. They are quite handy if you need to change the nozzle or hold hot pieces of steel.
Last but not least, if you plan to do smaller projects, you might want to buy a welding table as well, or make one yourself as a first project. At first, you can get by without one, but sooner or later you want to have one. Trust me, your knees and back will thank you for it.
After you have a table, attaching a vise would be a great improvement, they come really handy.
What Personal Protection Equipment is Recommended?
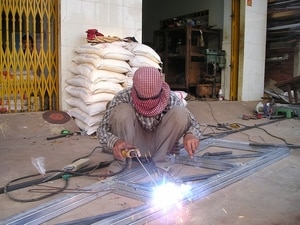
First of all, before you start working, make sure you read the welder’s operating manual, it contains important safety information. This article should not be used as a substitute for the manufacturer’s recommendations. With that said, there are four main things we need to protect ourselves from:
- UV rays
- Toxic fumes
- Sparks
- Hot metal
I remember when I was a kid my dad did not always pay attention to safety precautions. Sometimes when the weather was hot, he was welding only with a short-sleeved cotton T-shirt and denim jeans on. Sometimes when he needed to make a small weld in an awkward position, he did not even use a welding helmet! I know it had fixed filter lens (one that does not darken automatically), and I can imagine that it was not very comfortable to work with that, but that does not justify these kinds of actions. To protect his eyes from and face from burning UV rays, he just used to wear a regular denim cap, and while welding, he simply looked down. Basically, he was welding completely by his gut. I know, it sounds crazy and I do not recommend doing that to anyone! Today the protective equipment is relatively cheap and so well developed that there is NO reason to be foolish and risk your health.
To protect yourself from UV rays, hot metal, and sparks, you pretty much should be covered from head to toes with flame-resistant gear. NEVER, wear polyester! I have made that mistake myself, you probably can’t imagine how fast the sparks burn through polyester and how much it hurts when hot metal combined with melted polyester burns your skin.
So basically you need:
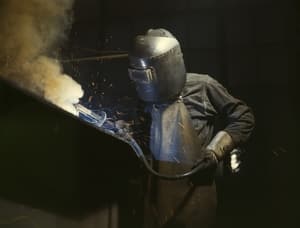
- Welding helmet
- Welding gloves
- Welding jacket and pants
- leather boots
First, the most important part of your body to protect is your face. Welding produces ultraviolet and infrared lights that will cause serious damage to your eyes and skin if not protected properly. We have all experienced sunburn, does not feel very good, does it?
My first personal welding helmet that my dad gave me, was one with a fixed-filtered lens which could be lifted up to have an overview of the workpiece without lifting the whole helmet. It sure was useful if I had to weld in tight spaces. Later I bought one with a self-darkening lens, which I have to say was game-changing, can’t actually imagine living without one anymore. And each year, the lenses keep getting bigger and bigger, which is even better, now some of them have a function to change the shade range of the lens. That means you can adjust the darkness of the lens according to your own wants and needs.
If you are a beginner, not quite sure if you are really into welding or not, buying a helmet with a self-darkening lens might be reasonable, but if you have serious interest toward welding, then I definitely recommend spending couple more bucks to buy one with adjustable lens. Helmets today are priced so that it makes almost no sense to buy one without the adjustable shade.
Picking a welding helmet for beginners might be a daunting task, I know the choices seem endless. If you feel overwhelmed, I will create a guide for them soon.
- Welding Gloves
Welding gloves are a must! As you can imagine, molten metal is hot, and without gloves, more than likely you are going to get hurt. In fact, there was a study done once, stating that 70% of employees who have injured their hands, admitted that they were not wearing gloves at the time of the incident. For some 70% might not look like much, but better be safe than sorry.
Now, our face and forearms are protected, next, we need to cover every inch of our naked body from UV light and hot sparks. For the upper body, I would advise you to buy a flame-resistant welding jacket. Under that, you can wear the regular cotton shirt as an extra layer of protection from hot sparks. For the lower body, you should have flame-resistant welding pants or at least really heavy denim jeans. One thing you want to avoid are pants with cuffs, they will catch flying sparks.
- Leather Boots
You definitely don’t want to wear tennis or cloth shoes. What you need is leather boots at least, but for extra protection, I would advise you to wear steel-toed leather boots. They are not as light, but even if you are not working with very heavy materials, I would still recommend them. Trust me, even if a small chipping hammer falls on your toes, it will hurt. Your feet might not be happy about wearing heavy-duty boots, but in my opinion, it is better to have my toes intact after a day in the garage.
In addition, for grinding, and cutting you want to buy earplugs, safety glasses, and plastic face shield. In case you bought or have a welding helmet with adjustable shade including grinding, then face shield is not mandatory.
Getting started with MIG
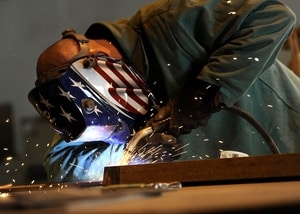
As I said before, MIG is regarded as the easiest type of welding
An ounce of practice is better than ton of theory!
- Prepare your surfaces
To have a nice, clean weld you have to clean your base metals from paint, rust, grease, and other excess dirt. You can simply use the grinder, wire brush, or a file to clean the areas where you are going to lay the weld.
Make sure you have a right wire. Simple rule for that would be: thinner wire for thin metals and thicker wire for thicker metals. Same goes for the wire type: for aluminum use aluminum wire, for mild steel use steel wire. If you are just starting out, I would recommend starting with 0.30 wire, with that you can weld thinner materials as well as thicker materials where you need more filler metal.
- Pick the right wire speed and amperage
Most welding machines have a voltage/amp chart behind the cover for that. Feel free to tweak them a little and see what works best for you. If you burn holes in your workpiece means that your power is too high and if your welds are forming in spurts might mean that your ground is not good enough,
Don’t forget to check if the polarity is right, for flux core DCEN (Direct Current Electrode Negative) and for solid wire with gas it should be DCEP (Direct Current Electrode Positive).
- Simply lay some beads
Just find some scrap metal, clean it, attach the ground clamp to the base metal, open up the gas and start practicing. Start out with doing some tack welds spending about two seconds to lay down each. Next, you can try to run a straight line, each about an inch long, keeping the handle at 15-degree angle slowly moving from left to right if you are right-handed. Keep even distance between the base metal and the nozzle, about ¼ inch.
- Try different motions
Easiest one to try might be circular motion. Just start doing circles, each overlapping the last one by half. Try to hold the welding gun with two hands, one as a support and the other to guide the nozzle, the steadier your motions are the better.
If you are using Flux Cored Wire, then it is important that you constantly pull the handle from the welding pool, to avoid the flux getting trapped inside the molten metal.
- Know your joints
Once you have practiced for a while, it is time to start marring metals together. There are five main joint types: Butt joint, lap joint, corner joint and T-joint and edge joint. I would start by doing lap joints. Simply overlap two pieces of metal, tack them from two locations at least, and do the actual weld.
Getting Started With Stick
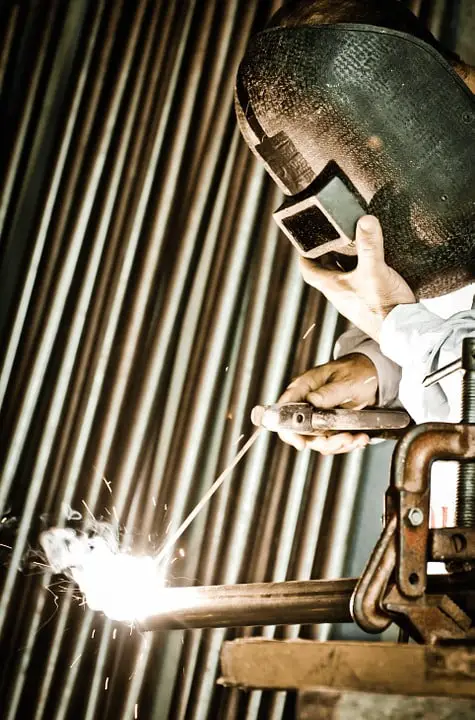
Learning stick welding for beginners is much more difficult to learn on your own than MIG welding, but it surely is possible. This here is just a basic overview, because it would be pretty much impossible to cover all the details in this post. To learn stick welding I really advise you to take a course on that or simply leverage the power of Youtube, you can find tons of great content there.
- Prepare your surfaces
It is not as important to clean your surfaces for stick welding as it is for MIG and TIG welding, for better results I would still advise you to use a wire brush or grinder to remove dirt and
- Set up your machine
If you use secondhand welder it is important that the connections between the cables and machine are tight and that the isolation around the cables is intact, there should not be any exposed copper. Next, attach the ground clamp to the base metal, or if you have a metal welding table, you can attach it to your table as well.
Pick an electrode and insert it into the electrode holder. I would use 6013 1/8” rods, they might not have the best mechanical properties, but they are good for thinner materials and they are easier to strike an arc with, in addition, the slag of these rods tend to come off quite easily.
Set the polarity to DCEN, if you own an AC machine, that’s all right, 6013 electrodes are AC friendly as well.
The amperage for these rods should be somewhere between 110-120 amps.
- Learn how to strike an arc
After you have your surfaces cleaned, machine set up properly, it is time to crank up the welder.
The first thing you should practice as a novice is striking an arc. Most people describe it as “striking a match” because it is quite similar to that, but trust me, even though it may sound easy if it is your first time using a stick welder there are a lot of ways to do this wrong. It is quite difficult to describe how to do it properly even as an experienced person in welding so for beginners I would recommend to watch a few videos before trying it out.
- Learn to run a straight bead
Once you feel comfortable about starting the arc, you can practice running straight lines. Find decent size metal plate 4×4 or 5×5 would be good, not thinner than 3/8”. Before you start, you want to find a good stable position to make one consistent weld from one end to the other. While welding, the rod should be at 15-20 degree angle toward the direction of welding, barely touching the base metal. As with FCAW, it is important that you consistently pull, not push the arc from the welding puddle to avoid the weld to be contaminated with slag. Start at the edge of the plate and use it as a guide to making your first straight weld.
After you completed the first bead, clean the slag with chipping hammer and wire brush and then repeat the process. Next bead should be right next to the last one. Keep repeating the process until the whole plate is covered with beads.
The basics of welding for beginners might feel boring, but to master the art of welding, you have to learn the basic fundamentals of welding before you can start working on more advanced projects.
Conclusion
It is possible to get into welding on your own, but this article is just to give you an overview of the basic things you need to know about the learning process and the tools you are going to need. Mastering welding as a beginner, as I said, takes time and effort like every new skill.
I don’t want to scare you, because learning the basics of welding is easier than you think (probably), but as I said, to really start getting things you need to put in some effort.
Once you have chosen your preferred welding method, you can check out my more detailed guides in the MIG or stick section of the blog. To learn more about safety, make sure you check out my posts about tools and safety as well.
